What is a NAS?
A Network-attached Storage, or NAS for short, is storage solution (starting from custom hardware going to full fledges servers) which provide access to files over the network.
It can easily fit in many workflows:
- Hey, I need to send you a a file.
Let me find a USB-Key.
Why not putting it on the NAS? - Who has the last report at hand?
Let me find who wrote it, so I can ask.
Why didn’t you put it on the NAS?
It also tends to be built with multiple disk, which allow you to have high capacity and/or fault tolerance (think about RAID), serving as the central storage for large and/or important documents:
- This archive is huuuuuuuuuge.
I should upgrade my workstation.
Why don’t you work directly on the NAS? It has multiple TeraBytes of storage. - Damn, my laptop is dead.
I should have an old copy of the document somewhere.
Why didn’t you work directly on the NAS? It would have survived a disk failure. - I heard that backups are important.
Do I need to set up different backups for every PC?
Why not just backup up the NAS?
While having redundant storage is not a backup, you can store all you data on the NAS itself and have it take care of backups on some external media (a USB disk, another NAS in a remote location, the cloud, …).
You could even use your NAS as the backup target for some machines, adding 2 layers of backup.
Do I need to buy a NAS?
Many reputable brands, like Synology or QNAP, provide off the shelf solutions for different needs and budgets.
I personally owned a Synology 2-Bay NAS, that is now holding my parents’ fond memories.
But…
Technically no.
Any computer can be a NAS.
A PC sharing a folder on the network, is technically a NAS.
Companies, or people with a Home Lab, often build entire servers to serve as a NAS.
They can vary drastically. From a Power Efficient Home Server, going up to LTT’s Petabyte Project (and successor), going down to One Board Computers.
What is this post about?
Well… since I haven’t lived with my parent for a while (my original NAS remained there), and I’m starting to ask, or my S.O. is starting to ask 😉, similar questions…
It is time to build a new one.
This is not a build guide.
It is a mad scientist diary down this rabbit hole.
What are the objectives?
In typical mad scientist fashion, let’s put some unrealistic requirements:
- I don’t want to buy a lot of expensive stuff.
- It needs to be quiet, even if I will probably just put it in the basement.
- It needs to be low power, power is expensive here 😉.
- It needs to be easily expandable in the future.
What are the options?
- I could go with an off-the-shelf NAS.
They tend to be expensive, which goes against (1).
Even worst, if I want (4) it would cost even more, because I would need to get one with many disk-bays.
Even worst, generally off-the-shelf NASs with 4+ bays tend to be more powerful, going against (3). - I could use an old server/PC.
This is doable, but “old” often means inefficient. I’ll let the experts take this route. - I have an old Raspberry PI 4B 4GB, lingering around… maybe it can do the job.
I already own it and it is collecting dust, so great for (1).
It uses passive cooling and it is relatively power efficient, (2) and (3) check.
I would need to use USB to connect the disks, but that should allow me to add more if I need down the road, so good for (4) too.
These would have been the considerations I should have taken into account, but…
I just want to build a NAS out of Scraps.
So… What are the challenges?
Connecting the disks.
I was able to find some Seagate IronWolf (4 TB, 3.5”, CMR) on SALE.
That is amazing.
8 Months later, they are still more expensive than when I bought them.
Still, I will not consider them in the final cost, but they put some constraints on the design.
These disks are 3.5” SATA, so I would need an enclosure able to power them, as they need both 5v and 12v.
Multi-Bay USB docks with an external power supply are a NOGO.
They are almost as expensive as a full fledged NAS.
A USB-To-SATA adapter + a SATA Splitter looks promising.
But… good SATA Splitters are expensive.
Some SATA Splitter don’t play nice with Software RAID (I don’t trust them to run hardware RAID).
I could consider a PCiE Host Bus Adapters (a.k.a. HBA) inside a USB-to-NVMe enclosure.
But… that ain’t possible.
USB-to-NVMe cannot add PCiE to the Raspberry Pi 4, they are specific to the NVMe protocol.
I could consider a Raspberry Pi 5, but… I don’t have it 😉.
There is technically a way to do it on the Raspberry Pi 4, but… No Thank You!
Let’s go back to the basics. I could use cheap USB-to-SATA enclosures.
3.5” ones are expensive, and 2.5” ones don’t provide 12V.
Wait… Don’t they?
The 12V pins are there, they are just left not connected…
I could just inject 12V in there and call it a day.
It could actually work.
So… here they are.
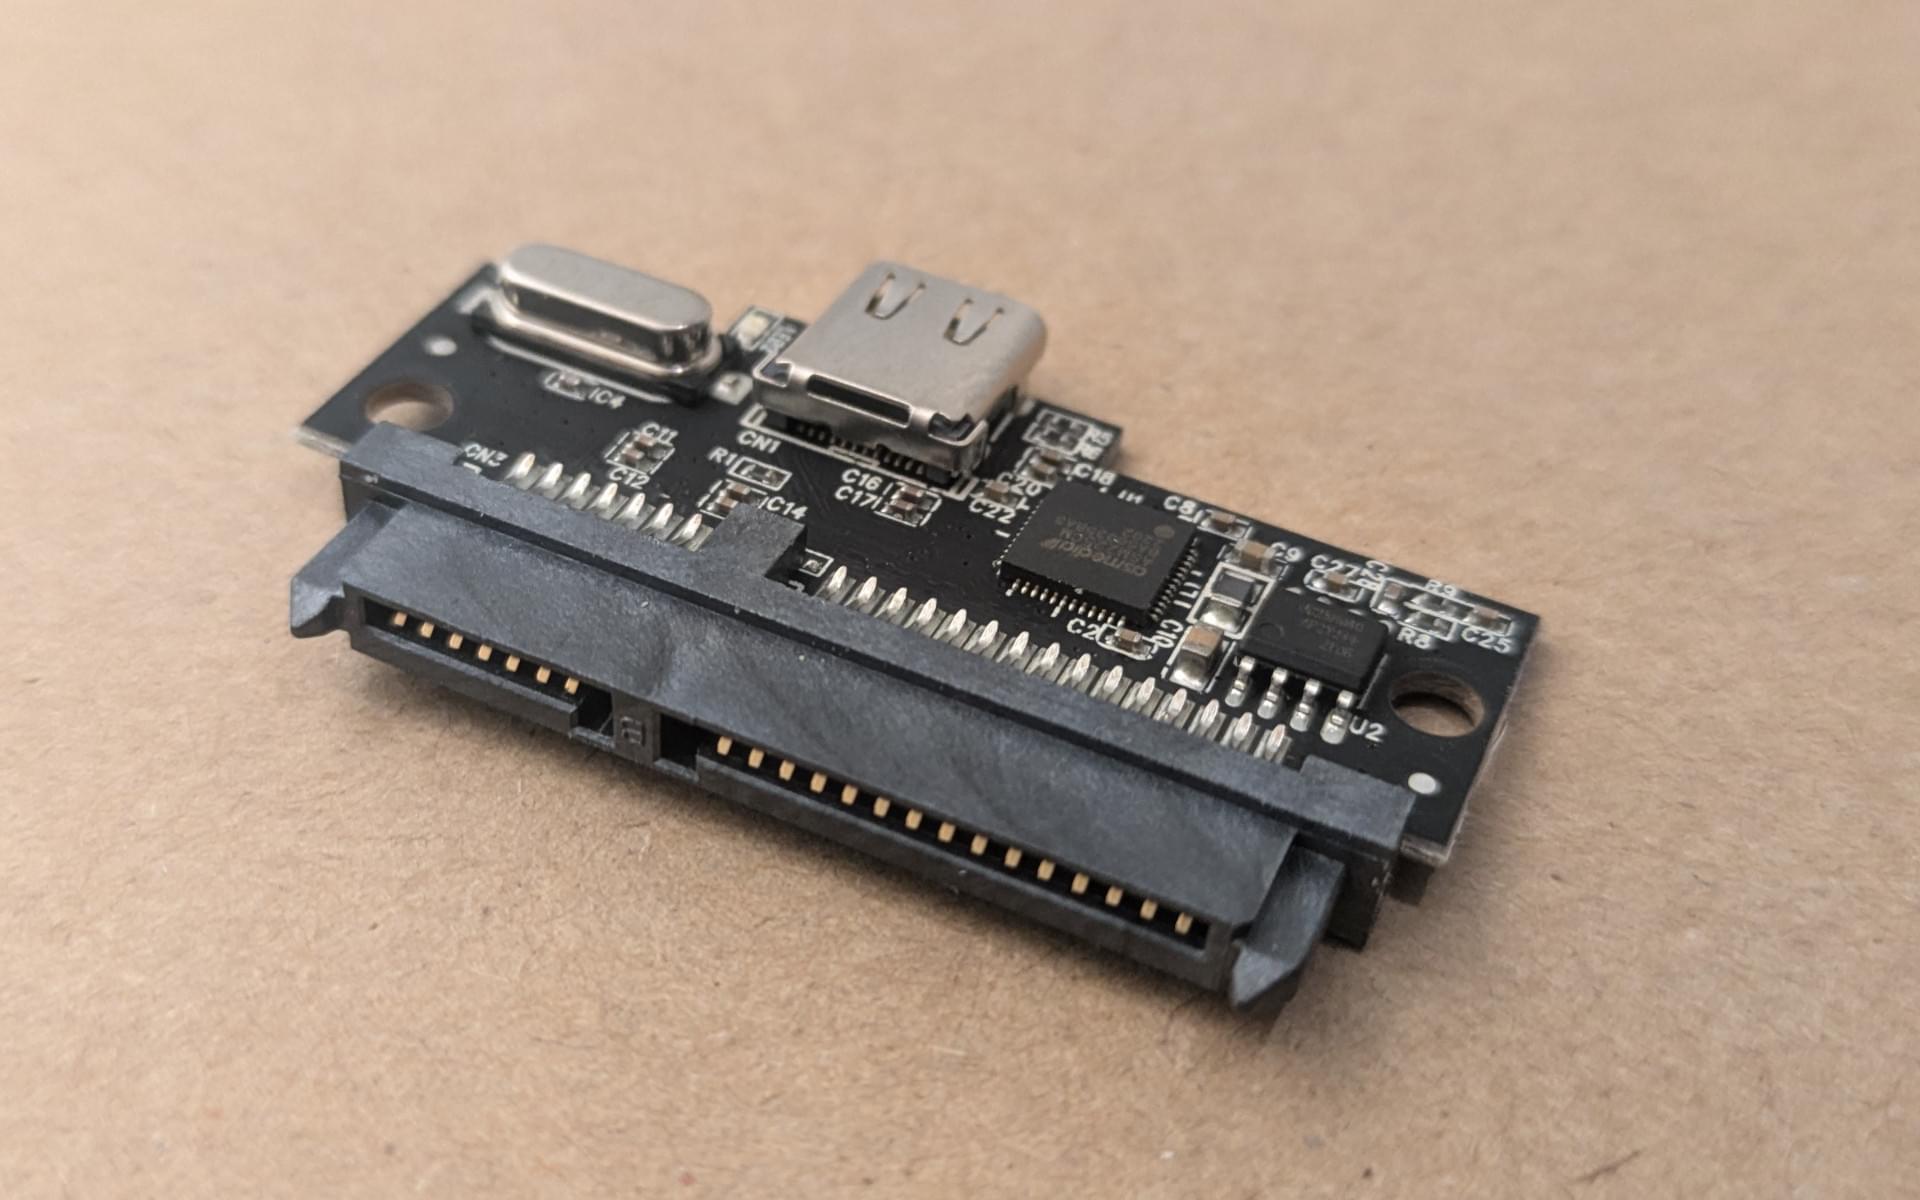
~5.50€ each
…so I bought 4 for future expansion.
I chose a model with an ASM235CM, because is the controller for which I’ve seen fewer complains around 😉.
Speed is not a concern. With USB 3.0 I could theoretically get 5 Gbps shared across the disks, but the 1 Gbps ethernet connection would become the bottleneck before USB does.
Raspberry Pis are famous for not always playing nice with USB-to-SATA enclosures.
There are many discussions on many different forums, but, fortunately, they all end with:
Just buy a powered USB hub.
I actually needed one, because I may need more than the 2 USB 3.0 ports that the Raspberry Pi 4B provides.
So… here it is.
~10€
Going back to power.
I need both 5V, for the Raspberry Pi 4 and the USB Hub, and 12V that I need to inject in the USB-to-SATA adapter.
There are options here…
I could use a Pico-PSU.
Yes… but I would need to find a way to power it.
I have a 12V laptop power supply lingering around, but most of them want 19V.
The ones accepting 12V a for sure out of budget.
I could use my 12V laptop power supply and use some DC-to-DC converters for the 5V.
I actually considered this one, but I couldn’t find a cheap reputable converter.
Also I would have needed to solder a lot of cables… maybe later 😉.
I could stick with USB power.
That is OK for the 5V, and I could use USB Power Delivery (a.k.a. USB PD) for 12V.
I just need a USB Power Delivery Decoy, like this one.
So…
A 4 ports USB PD compatible charger joined the team.
~33€
…100W are probably overkill, but I wanted a bit of extra power to cover for the spikes when disks start rotating.
And here is the decoy.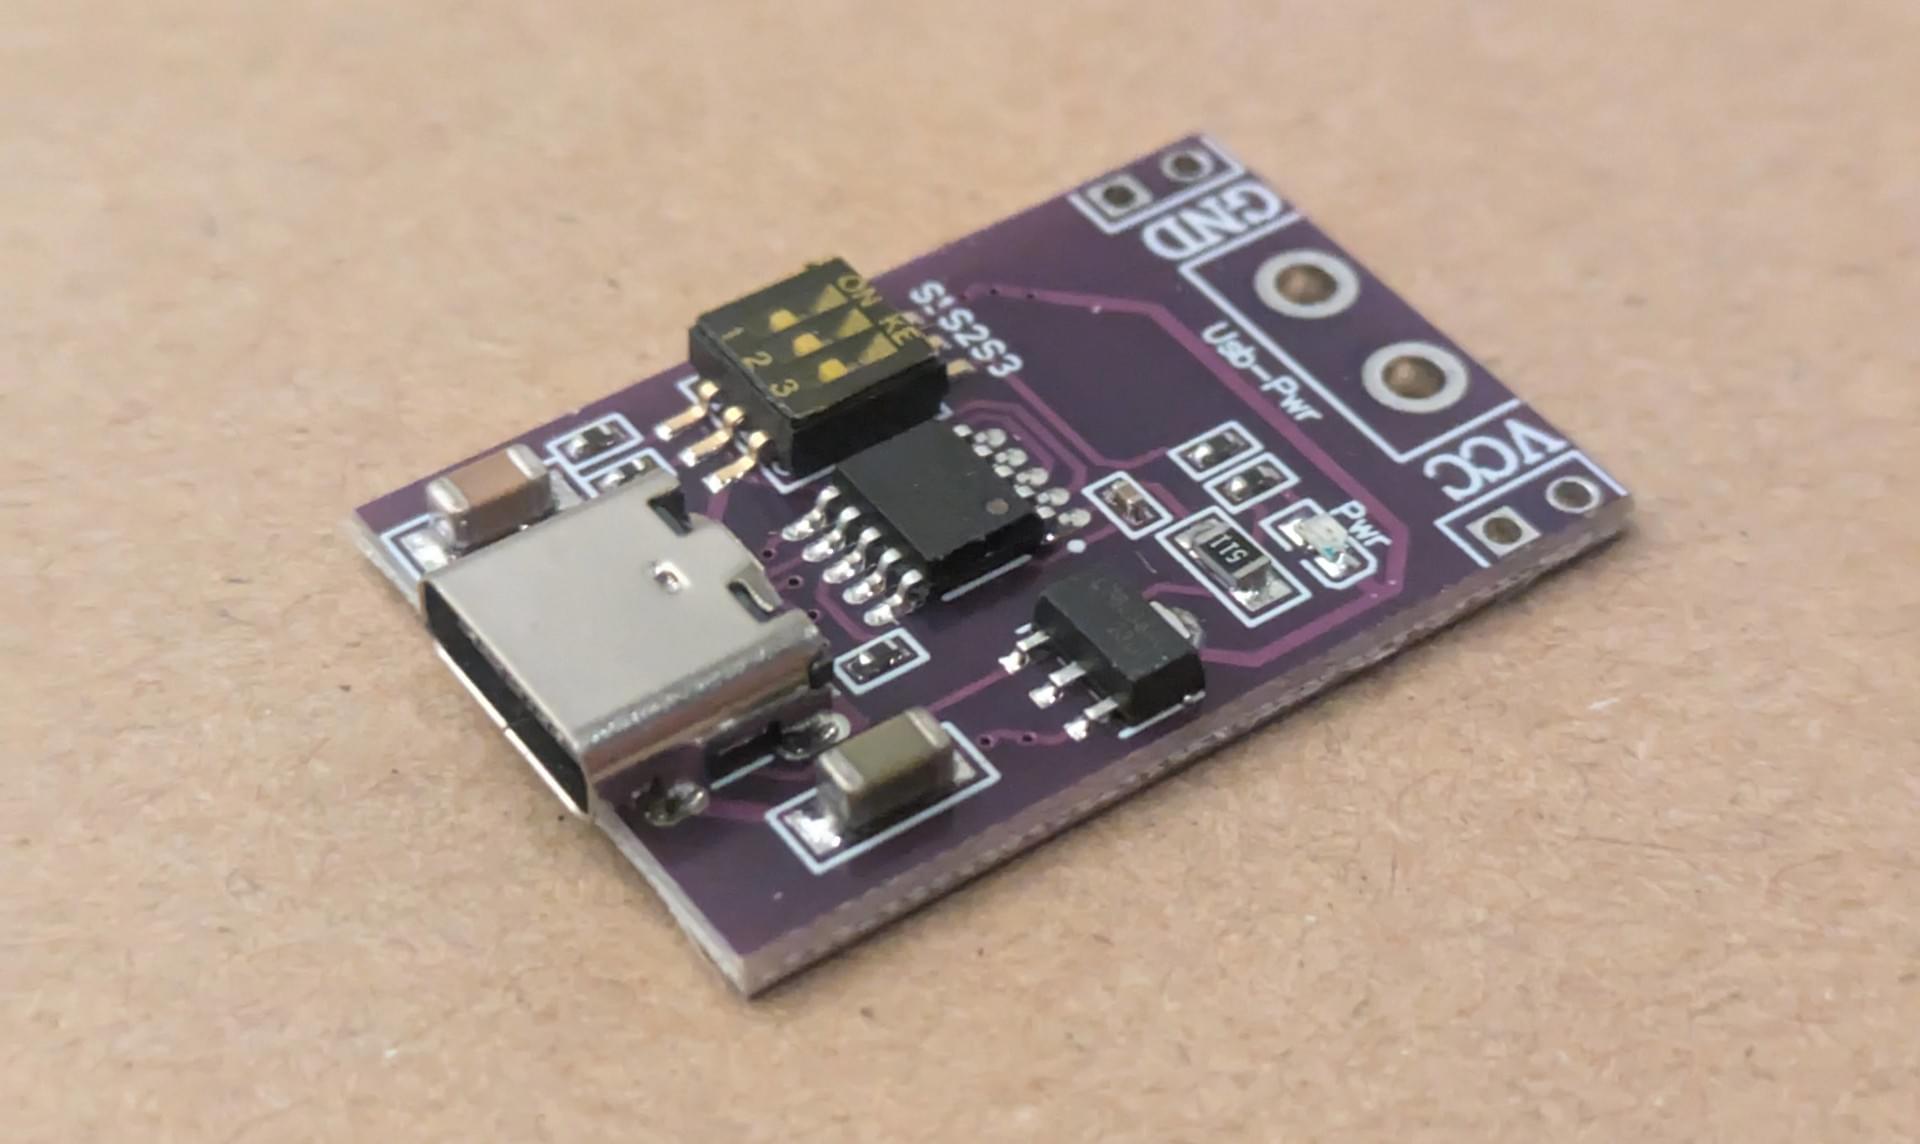
~3.50€
Software
A big hit w.r.t. Synology is the software.
TrueNAS would be great, but it doesn’t support ARM.
Rockstor supports ARM, but I really didn’t like the “we are Open Source, but if you don’t pay us the world could go on fine” vibe. I’m sure they are great, but the constant reminder for upgrading to the payed version was a bit too much for me.
OMV (openmediavault) looks OK. A bit barebone, but I can work with it.
Filesystem
While I had good experience in the past with ZFS, that is not an option here.
BTRFS looks promising. I will not use RAID5/6 due to reliability problems, but RAID1 (a.k.a. you can lose 1 drive without losing data) is more than enough for me. In the future, after adding more than 2 disks, I could consider RAID1C3 (a.k.a. you can lose 2 drive without losing data). The nice thing is that I can pick different RAID profiles for different folders.
Did it work?
Here are all the components.
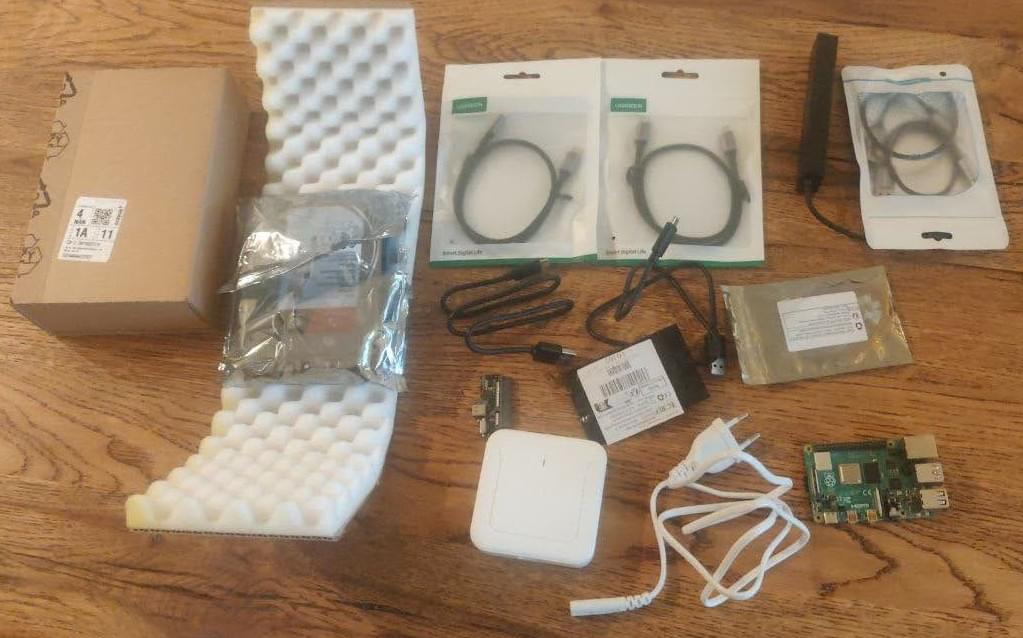
After a bit of soldering, to connect the USB PD 12V decoy with the USB-to-SATA adapters, a bit of tweaking for letting the disks go to sleep, and properly configuring a shared folder…
Yes it does.
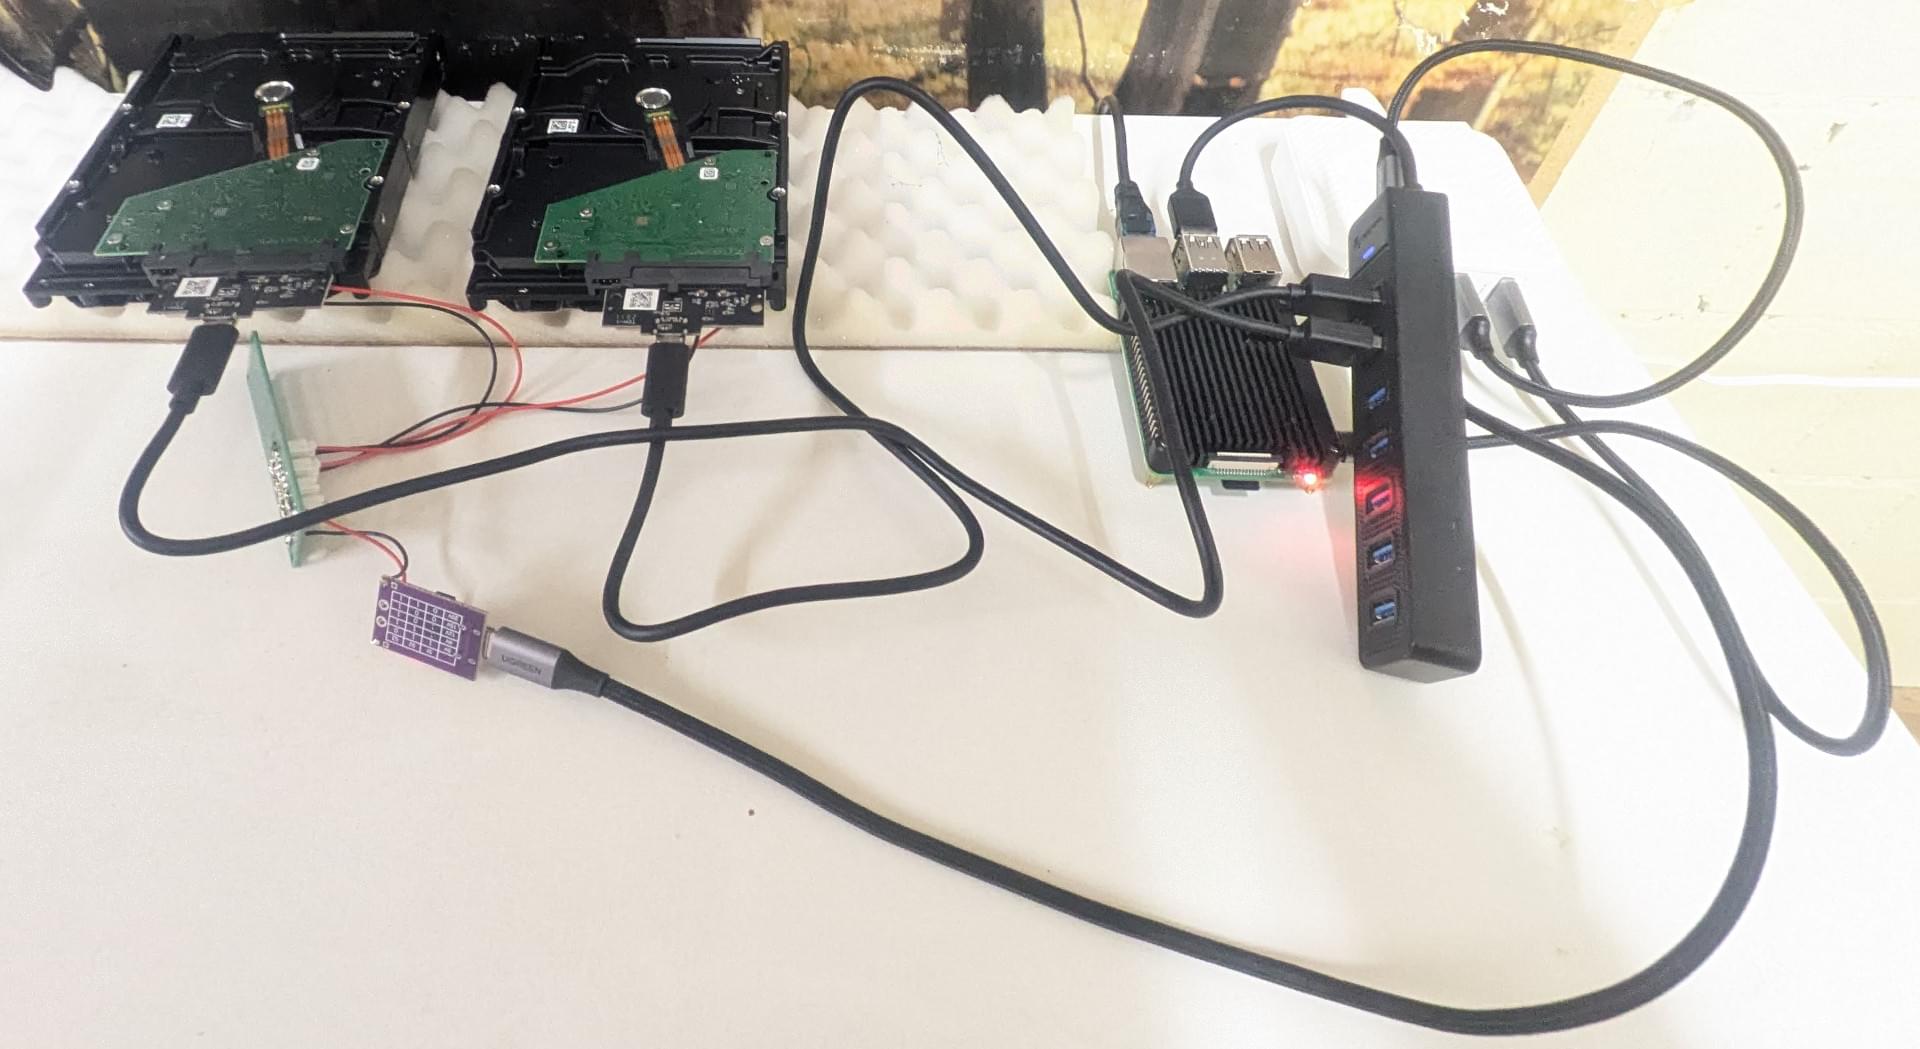
I’m really happy with the result.
For less then 60€ (~100€ considering the Raspberry PI 4B 4GB that I already owned) plus the cost of the disks (2 for now, I can upgrade to 4 when needed).
I can easily saturate the 1 Gbps connection and get on with my day.
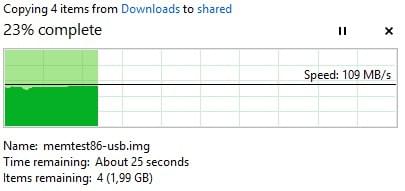
While consuming less than 15W (~6W on idle).
Is this project done?
Well, yes and no.
I will start using it, but it needs an enclosure…
Did anyone say 3D printer?
Carlo Bernashina
2024-10-20